Django File Upload With Google App Engine

Getting started with App Engine (Python 3)
1. Overview
Google App Engine applications are like shooting fish in a barrel to create, easy to maintain, and piece of cake to scale as your traffic and information storage needs change. With App Engine, there are no servers to maintain. Y'all simply upload your application and it's ready to get.
In this codelab, you volition acquire how to deploy a unproblematic Python spider web app written with the Flask web framework. Although this sample uses Flask, you tin use other spider web frameworks, including Django, Pyramid, Bottle, and web.py.
This tutorial is adjusted from https://deject.google.com/appengine/docs/standard/python3/quickstart
What yous'll learn
- How to create a simple Python server on Google App Engine.
- How to update the code without taking the server down.
What you'll need
- Familiarity using Python 3
- Familiarity with standard Linux text editors such as vim, emacs, or nano
Survey
How will you utilise this tutorial?
How would you rate your feel with Python?
How would yous rate your feel with using Google Deject services?
2. Setup and requirements
Cocky-paced environment setup
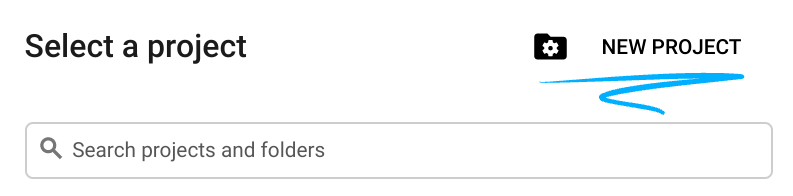
- Sign-in to the Google Cloud Console and create a new project or reuse an existing one. If you lot don't already have a Gmail or Google Workspace account, you must create one.

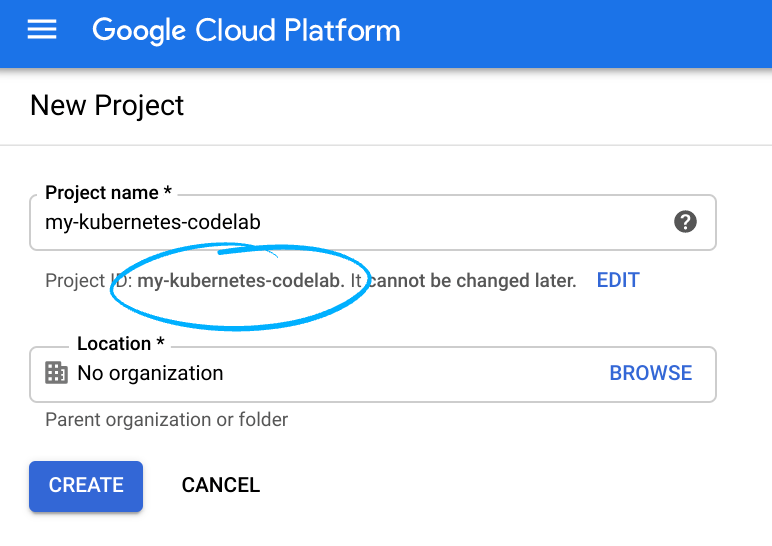
- The Project name is the display proper noun for this project'due south participants. It is a character cord not used by Google APIs, and you can update it at any fourth dimension.
- The Project ID must exist unique across all Google Cloud projects and is immutable (cannot be changed afterwards it has been set). The Cloud Console auto-generates a unique string; unremarkably you don't intendance what it is. In nigh codelabs, y'all'll need to reference the Projection ID (and it is typically identified every bit
PROJECT_ID), then if you don't like it, generate another random i, or, you can endeavor your own and see if it's available. And so it's "frozen" later on the project is created. - There is a third value, a Projection Number which some APIs use. Learn more than near all iii of these values in the documentation.
- Next, y'all'll need to enable billing in the Cloud Console in guild to use Cloud resources/APIs. Running through this codelab shouldn't cost much, if anything at all. To shut down resources so you don't incur billing beyond this tutorial, follow whatsoever "clean-up" instructions found at the end of the codelab. New users of Google Cloud are eligible for the $300 USD Gratuitous Trial program.
Start Deject Trounce
While Google Cloud can exist operated remotely from your laptop, in this codelab you will exist using Deject Crush, a command line environment running in the Cloud.
Activate Cloud Shell
- From the Cloud Console, click Activate Cloud Shell
 .
.

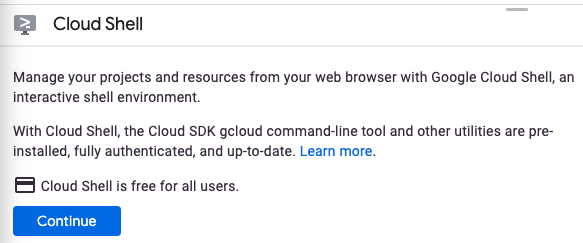
If yous've never started Deject Crush earlier, you're presented with an intermediate screen (beneath the fold) describing what it is. If that'south the case, click Continue (and you won't ever see information technology again). Hither's what that one-time screen looks like:
It should simply accept a few moments to provision and connect to Cloud Shell.

This virtual machine is loaded with all the development tools y'all need. It offers a persistent 5GB habitation directory and runs in Google Deject, greatly enhancing network performance and authentication. Much, if not all, of your work in this codelab can exist washed with simply a browser or your Chromebook.
In one case connected to Cloud Shell, you should see that you are already authenticated and that the project is already gear up to your project ID.
- Run the post-obit command in Deject Crush to ostend that y'all are authenticated:
gcloud auth list
Command output
Credentialed Accounts ACTIVE Business relationship * <my_account>@<my_domain.com> To ready the agile account, run: $ gcloud config set account `ACCOUNT`
- Run the following command in Deject Vanquish to confirm that the gcloud command knows about your project:
gcloud config list project
Command output
[core] project = <PROJECT_ID>
If it is not, you tin set information technology with this control:
gcloud config fix project <PROJECT_ID>
Command output
Updated belongings [core/project].
three. Write the web app
Afterwards Cloud Shell launches, you tin use the command line to invoke the Deject SDK gcloud command or other tools available on the virtual motorcar case. You lot tin can use your $Dwelling directory in persistent disk storage to store files across projects and betwixt Deject Shell sessions. Your $Abode directory is private to you and cannot be accessed past other users.
Permit'south get started past creating a new folder in your $Habitation directory for the application:
mkdir ~/helloworld cd ~/helloworld
Create a file named main.py:
touch main.py
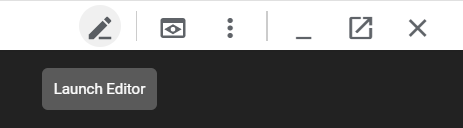
Edit the file with your preferred command line editor (nano, vim, or emacs) or by clicking the Cloud Beat out Editor button:
To directly edit the file with Cloud Beat Editor, use this control:
cloudshell edit main.py
main.py
import flask # If `entrypoint` is non defined in app.yaml, App Engine volition wait for an app # called `app` in `main.py`. app = flask.Flask(__name__) @app.get("/") def hello(): """Return a friendly HTTP greeting.""" return "Howdy World!\n" if __name__ == "__main__": # Used when running locally but. When deploying to Google App # Engine, a webserver procedure such as Gunicorn will serve the app. This # can be configured by adding an `entrypoint` to app.yaml. app.run(host="localhost", port=8080, debug=Truthful) 4. Define the dependencies
To specify the dependencies of your spider web app, get back to the terminal and create a requirements.txt file in the root directory of your project, with the exact version of Flask to use:
touch requirements.txt
To edit the file with Cloud Shell Editor, use this command:
cloudshell edit requirements.txt
requirements.txt
Flask==2.0.iii
5. Configure the deployment
To deploy your web app to App Engine, y'all need an app.yaml file. This configuration file defines your web app's settings for App Engine.
From the terminal, create and edit the app.yaml file in the root directory of your project:
touch app.yaml
To edit the file with Cloud Shell Editor, use this command:
cloudshell edit app.yaml
app.yaml
runtime: python39
6. Deploy the web app
From the terminal, bank check the content of your directory:
ls
You must have the 3 following files:
app.yaml main.py requirements.txt
Deploy your web app with the post-obit command:
gcloud app deploy
The outset time, you need to choose a deployment region:
Please cull the region where y'all want your App Engine application located: [1] asia-east2 ... [seven] commonwealth of australia-southeast1 [8] europe-west [nine] europe-west2 ... [12] northamerica-northeast1 [13] southamerica-east1 ... [19] us-west4 ... Please enter your numeric pick:
Confirm to launch the deployment:
Creating App Engine application in project [PROJECT_ID] and region [REGION]....done. Services to deploy: descriptor: [~/helloworld/app.yaml] source: [~/helloworld] target project: [PROJECT_ID] target service: [default] target version: [YYYYMMDDtHHMMSS] target url: [https://PROJECT_ID.REGION_ID.r.appspot.com] Do you want to continue (Y/n)?
Your app gets deployed:
Beginning deployment of service [default]... Created .gcloudignore file. Run across `gcloud topic gcloudignore` for details. ╔════════════════════════════════════════════ ╠═ Uploading 3 files to Google Deject Storage ╚════════════════════════════════════════════ File upload done. Updating service [default]...done. Setting traffic separate for service [default]...washed. Deployed service [default] to [https://PROJECT_ID.REGION_ID.r.appspot.com]
Your spider web app is at present ready to reply to HTTP requests on https://PROJECT_ID.REGION_ID.r.appspot.com.
7. Test the web app
Your spider web app is ready to respond to HTTP requests on https://PROJECT_ID.REGION_ID.r.appspot.com.
Beginning, retrieve your spider web app hostname with the gcloud app draw command:
APPENGINE_HOSTNAME=$(gcloud app depict --format "value(defaultHostname)")
Examination your web app with this elementary HTTP GET asking:
curl https://$APPENGINE_HOSTNAME
You should get the following reply:
Hello Earth!
Summary
In the previous steps, you lot set up a simple Python web app, ran, and deployed the awarding on App Engine.
8. Update the web app
Modify your web app by irresolute the hello() function body in your main.py file.
To edit the file with Cloud Shell Editor, use this command:
cloudshell edit main.py
principal.py
import flask # If `entrypoint` is not divers in app.yaml, App Engine will look for an app # called `app` in `chief.py`. app = flask.Flask(__name__) @app.become("/") def hello(): """Render a friendly HTTP greeting.""" who = flask.asking.args.become("who", "Globe") return f"Hello {who}!\n" if __name__ == "__main__": # Used when running locally just. When deploying to Google App # Engine, a webserver procedure such as Gunicorn volition serve the app. This # can be configured past calculation an `entrypoint` to app.yaml. app.run(host="localhost", port=8080, debug=Truthful) From the terminal, update your web app past deploying again:
gcloud app deploy --tranquility
Note: The --quiet flag disables the interactive prompt, which directly launches the deployment.
The new version of your app gets deployed:
Beginning deployment of service [default]... ╔════════════════════════════════════════════ ╠═ Uploading 1 file to Google Deject Storage ╚════════════════════════════════════════════ ... Deployed service [default] to [https://PROJECT_ID.REGION_ID.r.appspot.com]
Test the new version of your spider web app, exactly every bit you lot did previously:
roll https://$APPENGINE_HOSTNAME
Yous should become the same reply:
How-do-you-do World!
Test information technology with the optional parameter:
coil https://$APPENGINE_HOSTNAME?who=Universe
You should get the following answer:
Hello Universe!
Summary
In this stride, you updated and redeployed your web app without whatsoever service interruption.
9. Congratulations!
You learned how to write your start App Engine web application in Python!
Learn more
- App Engine Documentation: https://deject.google.com/appengine/
- Explore this tutorial to write a fully-fledged Python app on App Engine: https://cloud.google.com/appengine/docs/standard/python3/building-app/
License
This work is licensed under a Creative Commons Attribution two.0 Generic License.
Except as otherwise noted, the content of this page is licensed under the Creative Commons Attribution 4.0 License, and code samples are licensed under the Apache 2.0 License. For details, see the Google Developers Site Policies. Java is a registered trademark of Oracle and/or its affiliates.
Source: https://codelabs.developers.google.com/codelabs/cloud-app-engine-python3
0 Response to "Django File Upload With Google App Engine"
Enviar um comentário